



Bikepacking, or bicycle touring, is an exciting way to set off on an adventure. The road is yours to explore! Once your gear is attached to your bike, you can reach destinations more quickly than if you were on foot.
But if you decide to strap your luggage to your two-wheeler, some strategic thinking is required. Where and how should you distribute the weight? A loaded bike will logically never ride as well as an unloaded one. However, with weight distributed intelligently, you'll be able to fully enjoy the off-road trails that lie ahead of you.
How to distribute your luggage:
- Place lighter items in a bag attached to your saddle or handlebars. Overloading these bags can nevertheless have a negative impact on the handling of your bike. Many bikepackers use them for items such as clothing, a sleeping bag, a lightweight sleeping mat, or a tent.
- Place heavier items in the bag attached to your bike frame. Loading your stove, fuel, inner tubes, food, and other heavy items into this bag will keep your bike's centre of gravity relatively low and will therefore help you manage its balance.
- Keep frequently used items easily accessible. You can also attach small pouches or bottle cages to your handlebars, top tube, or down tube to store your energy bars, water bottle, maps, and mobile phone.
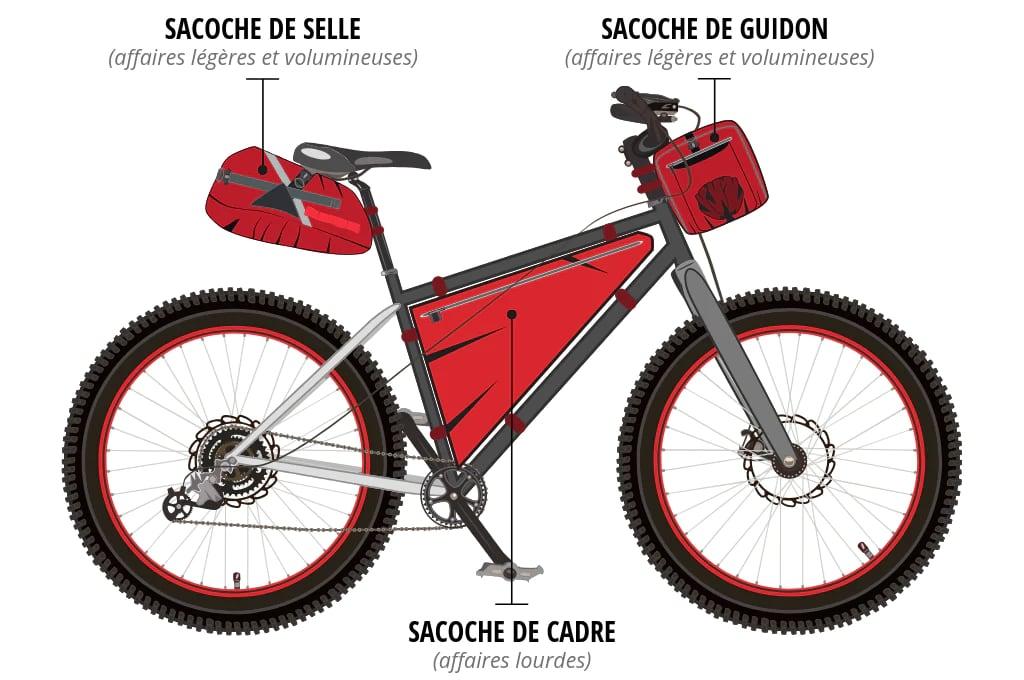
Keep in mind that there is no single right way to prepare your bike for touring. If you're just starting out, you can follow the few principles outlined in this article but, with your own experience and that of other bikepackers, you'll soon discover what works best for you. Important! Make sure that the total weight of your gear combined with your own does not exceed the maximum load capacity of your bike (most bike manufacturers indicate the maximum permitted weight in their manuals and/or on their website).
What can you store in the saddle bag?
The most important thing when filling the bag under your saddle is to avoid putting heavy items in it. Excessive weight will lead to poor weight distribution and you will consequently have more difficulty riding.
How to pack your saddle bag:
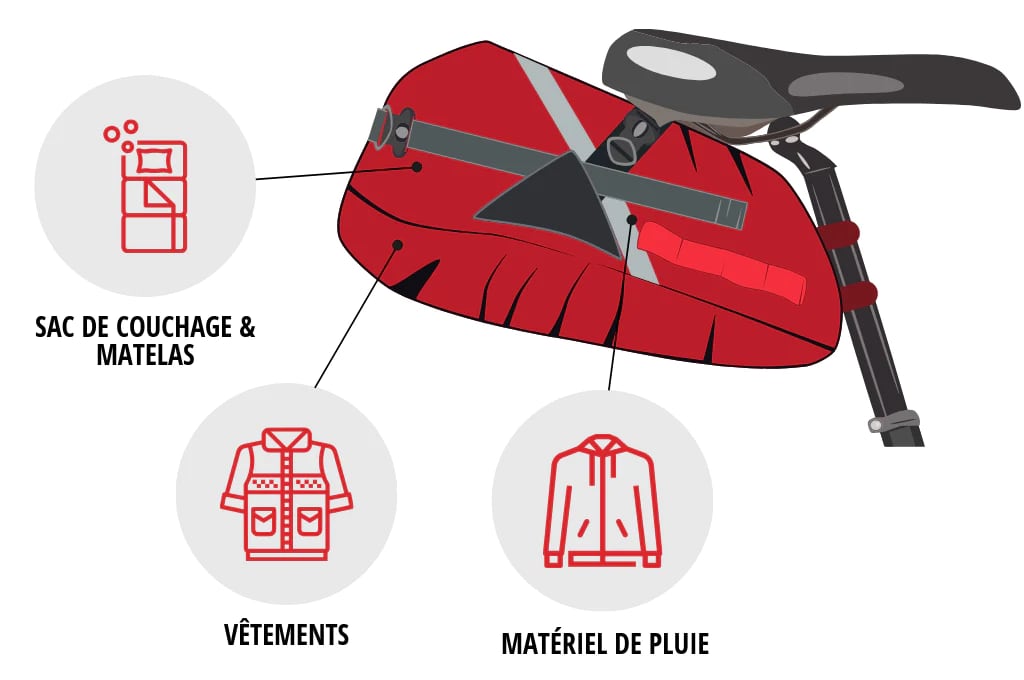
- Only fill the bag with lightweight items. More experienced bikepackers use it for bulky yet lightweight gear such as clothing, a rain jacket, or sleeping equipment. If your saddle bag is not waterproof, make sure your sleeping bag and clothes are stored separately in waterproof stuff sacks.
- Place the heaviest items closest to the saddle. This can help limit the swaying effect that sometimes occurs with this type of bag.
Bear in mind that, although accessing the saddle bag is not particularly difficult, it is neither quick nor convenient. Therefore, avoid storing items you will frequently need during your ride.
What can you store in the handlebar bag?
As with the saddle bag, pay attention to what you place near the handlebars. Too much weight can drastically affect the handling and steering of your bike. As a rule, try to ensure that the front bag weighs the same as the rear bag. This way you will maintain good balance when you start riding.
How to pack your handlebar bag:
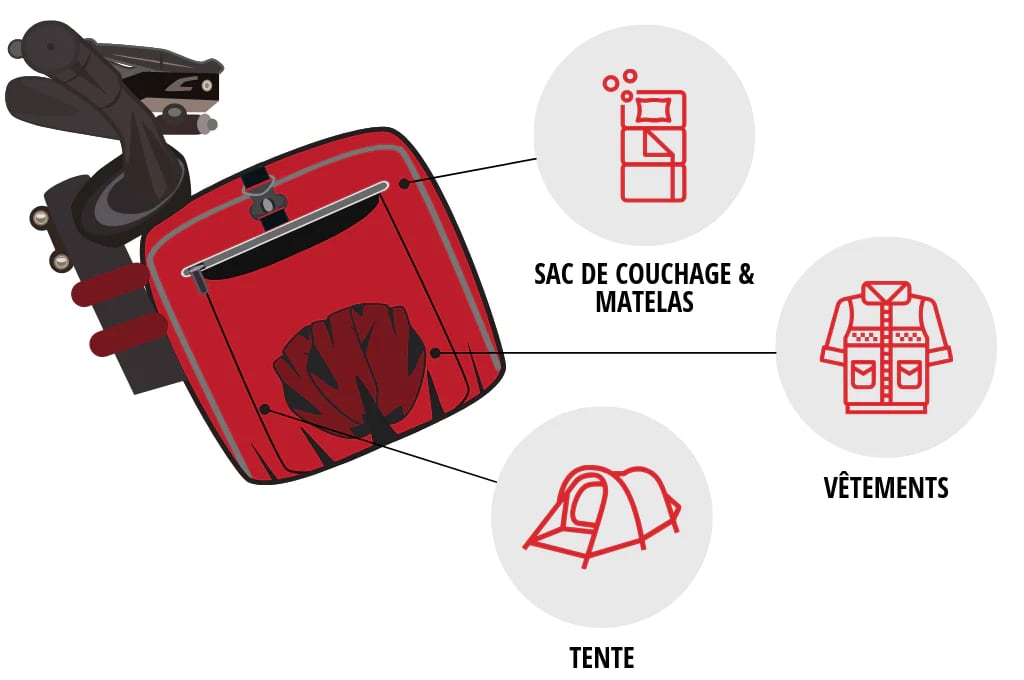
- Use the front bag for lightweight, cylindrical items. This is a suitable place to store a tent or a waterproof stuff sack filled with clothing. You can of course also place your sleeping bag or rolled-up sleeping mat in there.
- Keep frequently used items accessible. Anything buried too deep will be difficult to reach. For example, pack your rain jacket last so that it is immediately available in the event of a downpour. Some bags feature an additional zipped pocket for storing small items such as gloves or a hat.
What can you store in the frame bag (Frame Pack)?
As its name suggests, a frame bag or frame pack fits inside the frame of your bike. Most bikepackers try to store as many items as possible in it in order to keep the bike's centre of gravity low and maintain a certain level of stability.
How to pack your frame bag:
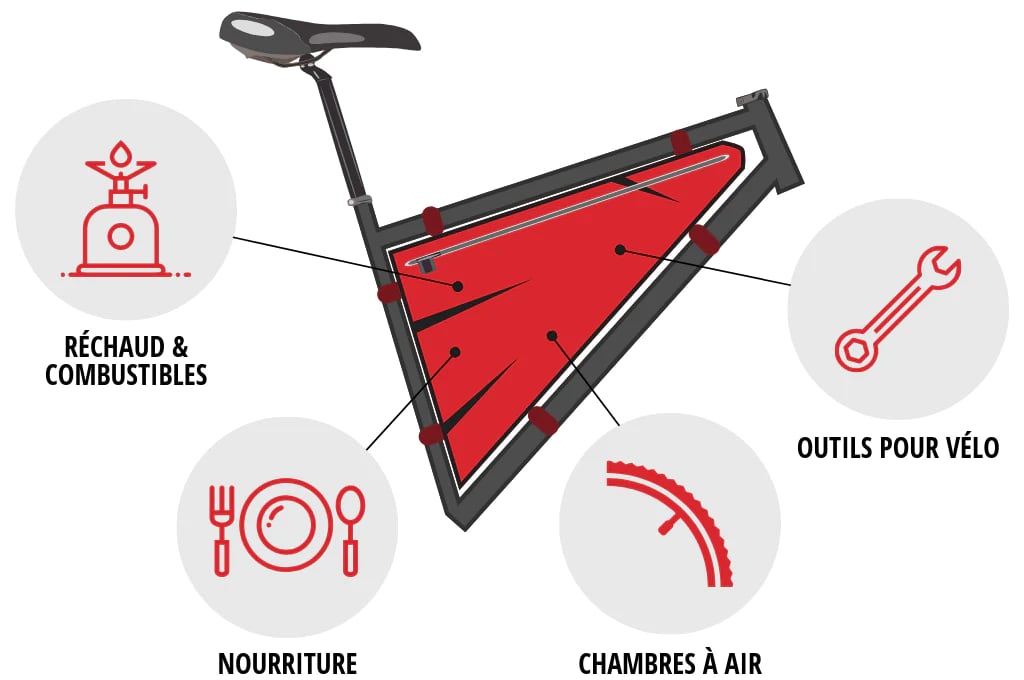
- Use this bag for items you rarely need. Trying to retrieve an item buried at the bottom of a frame bag can be quite a challenge — keep this in mind when packing.
- Store the heaviest items at the bottom. Pack your tools, inner tubes, stove, fuel, and meals at the bottom of the bag. It is also sometimes possible to store a water reservoir connected to a tube that runs up to the handlebars, allowing you to stay properly hydrated while riding.
Other storage options
Specialist manufacturers offer a multitude of creative storage ideas. In addition to the categories described above, other pouches, bags, or bottle cages can also suit your carrying needs perfectly. Can't find a place for a particular item? There's a solution to every problem!
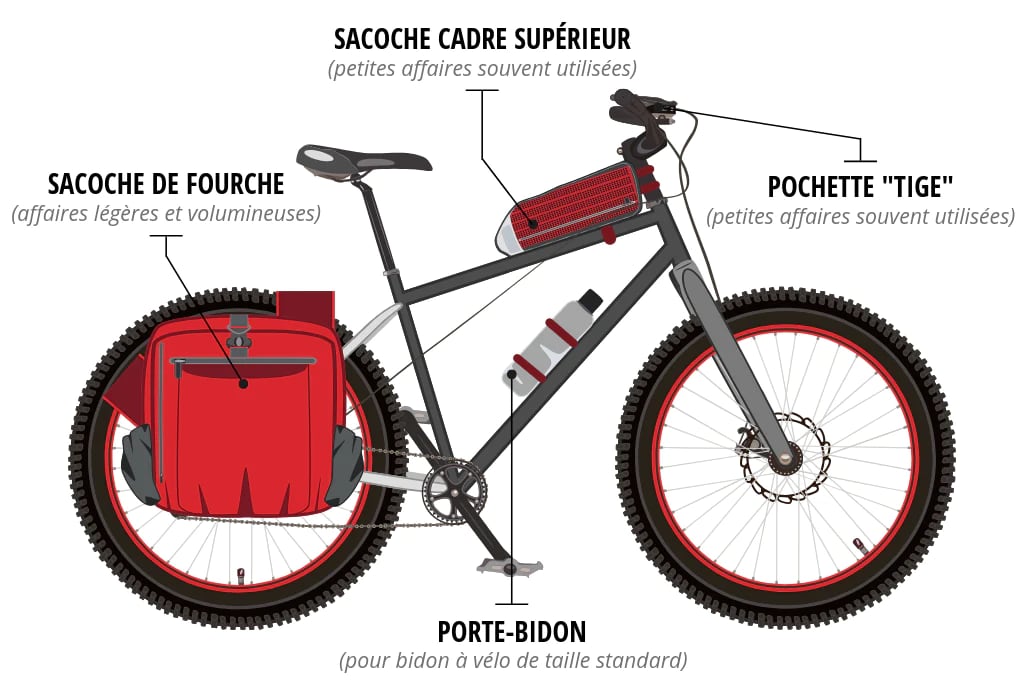
Other bike storage options:
- Stem pouch: this small bag attaches to your handlebars and can be used to store your snacks, water, maps, mobile phone, or sunglasses. Some people also use it to carry their camera and lenses.
- Top tube bag: slightly larger than stem pouches, this bag can also help you quickly access small everyday items.
- Bottle cages: as the name suggests, it is possible to attach bottle cages to your frame (under the saddle and/or on the down tube) using small bolts pre-fitted on most bikes. In addition, larger bottle cages are available that can be attached to both sides of the fork, in which you can insert larger water bottles or containers.
- Fork bags: these can easily increase the amount of gear you carry and replace a backpack. However, be careful as they can unbalance your bike if poorly proportioned. Always use them in pairs to maintain a certain balance. They are far from essential for most bikepackers.
- Backpacks: many bikepackers avoid wearing a backpack during their road trip as it can be cumbersome and tiring while cycling. But for longer journeys that require more food and gear, it becomes unavoidable. So, if you opt for a backpack, choose the lightest one possible. You'll be able to store additional gear and a hydration bladder in it. Generally speaking, the rule is not to exceed a capacity of 20 litres so that it remains comfortable to wear.
A few extra tips
Do a test run beforehand: before setting off on your adventure, load up your bike and go for a short ride, ideally on terrain similar to what you'll be riding later. By getting a feel for how the weight affects your bike, you'll still have the opportunity to make any adjustments before the big departure.
Don't overload yourself: many beginners make the mistake of bringing too much gear. Every trip is different and, with experience, you'll be able to identify what you truly need for your next adventures.
Reduce weight to a minimum: there are countless tips and tricks for reducing weight and saving space.

How to distribute your luggage when bikepacking